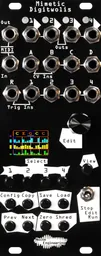
Mimetic Digitwolis has been in the works for a long time. The original, Mimetic Digitalis, was one of our most popular modules ever, so we needed its sequel to really up the ante. In this post, we’re going to delve into the history of the new hardware, and talk about some of the hard choices and why we made the decisions we made. In a later post, we’ll talk about the firmware development – and boy, there’s a lot to talk about there.
Starting out: Mimetic Digitwolis design concepts
Way back in 2016, the original Mimetic Digitalis was prototyped.


In 2024, we got serious about working on a sequel. When coming up with a new design, we generally take a subtractive approach: we write down EVERYTHING that we could possibly want the hardware to do, then strip things away until we have a reasonable design concept. We mocked up quite a few concepts, in a variety of sizes – everything from 10 HP to 20 HP. The 12 HP concept ended up being the most appealing to us, and we started to really think about what the product could be:

You’ll notice quite a few similarities between this mockup and the final product.
In the end, we decided that we really wanted the final module to be the same 10 HP footprint as the original, and we slimmed down the design to make everything fit in the same package. This allowed the new version to be a drop-in replacement for users of the original, and kept us from making an entirely different sequencer – we didn’t want to lose the magic of the first version. We also really wanted to keep the new version price-competitive with the old one, and adding HP is a sure way to add cost.
Prototyping
Once we had a paper concept of what we wanted the hardware to do, we could start developing a prototype. The first prototype was a bit of a challenge. We wanted to use a processor that we had lots of stock of (a choice that would later haunt us), but needed to add additional memory. This proved to be… challenging, on both the hardware and software side, and required lots of firmware touchups, hardware modifications, and even a daughterboard we designed when we were well into development (in purple below).
By the time we finished with all the bits the prototype needed, we had more things running on the SPI peripheral on the CPU than we had SPIs. Stephen then had to figure out how to effectively multiplex two things on a single SPI, which was not a fun task and added a lot of complexity to the code.

The original prototype, held together by solder, hope, and dreams.
Despite the… questionable mechanical stability of this first prototype, it worked wonderfully and allowed us to get 95% of the way done with prototyping the firmware. It also showed us what changes we needed to make – like removing some unnecessary LEDs and moving some controls – which reduced the final cost and improved usability.
Final hardware
Most products take multiple hardware revisions before we’re ready to go to press, so to speak. Mimetic Digitwolis was a rare one where we only needed one prototype. This was largely driven by the fact that this one lent itself well to modifications (see above)...We were able to test all the changes in place on the first version. Once we were satisfied, we sent it off to be built, made some final tweaks to the hardware, and got ready to put it into the world.

Firmware development gets complicated sometimes.
Of course, there’s a bit more to the story when it comes to the firmware development. Despite its compact size and relatively straightforward interface, Mimetic Digitwolis ended up being one of the most complex firmwares we’ve ever worked on due to its enormous functional potential.
In a few weeks, we’ll share a bit more behind the scenes of the firmware development.