Auxiliary, or aux, sends: they’re a useful tool for a lot of things. Want to have a balanced and natural-sounding reverb in your mix? Want to add some punchiness and grit to a whole patch? Conversely, want to turn your entire patch into a distorted mess? Read on to find out how aux sends can help YOU today!
But wait, what is an aux send?
Let’s back up allllll the way to the beginning here. Aux sends come from traditional mixers, and their most common use is controllably adding things like reverb and delay to a whole mix with a single FX processor. However, they can be used for much more than that, and that’s what we’ll be exploring today. And the great thing is that you don’t even need a mixer with aux sends built-in to utilize these concepts: aux sends are pretty simple to patch from scratch.
In fact, let’s start there to see how these work. Aux sends are basically a second mixer in addition to your first mixer: to patch an aux together, you’ll need a bunch of mults, a primary mixer, and a secondary mixer to act as your aux control. You’ll also need something to route your aux through: let’s be traditional and use a reverb for this example. First, mult a sound into a channel on your primary mixer and a channel on your aux mixer. Repeat this for as many sound sources as you’d like to use,but keep an open channel on the primary mixer. Route the auxiliary mixer through your reverb and then into your primary mixer. Adjusting the levels on your primary mixer brings your sounds into the mix as you’d expect, but the aux mixer is now a set of send controls: turning the levels up or down on each channel changes how much that signal is sent through our reverb.

Many mixers have aux sends and returns built-in, so you don’t have to patch them from scratch if you don’t want to. But now we know what it’s doing under the hood!
Post vs. pre fader sends
Some mixers have options for pre- or post-fader sends on their channels. What does this mean? Pre-fader sends ignore the volume control of the channel (the fader) and the aux send amount is completely independent. This means that, for instance, you could have a sound completely muted but still run it through an aux effect. A post-fader send, takes into account the level setting of a particular channel. If you turn down the volume of a channel, it’ll also turn down the volume of the signal being sent to the aux. It’s a subtle difference, but it’s important sometimes. For example, if you want a sound to be quiet, but also have a huge presence in your reverb, you’ll probably want a pre-fader send with the main volume fader low and the aux send set high. If you’re performing and want to fade your sounds in and out of the mix with a single control, a post fader send is probably a better choice.
What are aux sends good for?
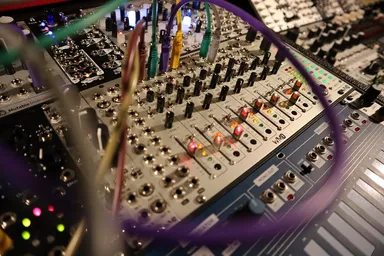
So, now that we know the ins and outs (heh) of aux sends and returns, what can we do with them? Let’s start traditional: here, we’re using the Desmodus Versio in the aux loop of the WMD Performance Mixer post fader. Note that the Blend control is fully clockwise: since our dry signal is already present in our mixer, we don’t need any more of it in our aux loop. Also note that since the send and return loop of the mixer is mono, but the DV can work as a mono-to-stereo device, we’re using the normal aux out but coming back into a stereo channel. It works and sounds exactly the same as using an aux return, it just gives us more stereo loveliness!
Let’s try something a little more mix oriented: if you’ve been reading the blog for a while you may remember our post on compression. We talked a bit about parallel compression in that post, and wouldn’t you know it, you can do some fantastic parallel compression routings with aux loops, too. Here, we have a percussion patch running through our mixer, but we have a compressor in the aux loop instead of a reverb. The compressor has very aggressive settings, but since it’s also mixed with the uncompressed copy, it sounds nice and balanced.
Now, those were some pretty traditional examples of aux loops. Let’s look at something more experimental, shall we?
Here, we have the Seca Ruina processing a distinctly unfriendly patch. Who doesn’t love some hardcore every once in a while, though? This is a really fun way to patch if you’re in the mood for something incredibly distorted as you get some really interesting interactions from multiple signals running through the single distortion circuit.